Scenario: A sudden storm, a metropolitan area plunges into darkness as the power goes out, and you find yourself faced with a terrifying catastrophic situation that requires immediate shelter.
Knowing how to get out of the rut and survive an emergency can be the difference between life and death in a world of terrifying possibilities and catastrophic consequences. But some scenarios make survival extremely difficult, if not impossible, and it's crucial to know what types of shelters to look for, what's available, and what each type of protective shelter is effective for.
One of the most important aspects of emergency preparedness is choosing the right shelter for the situation. This guide covers different types of survival shelters—from temporary wilderness shelters that can be built with just a few tools to more permanent shelters, including those that provide protection from nuclear fallout—and lists the essentials you need to keep your shelter ready for all types of emergencies.
In this text, we will use the slang term SHTF—a situation where chaos and disorder reign, typically following a major disaster or social upheaval.
TYPES OF EMERGENCY SCENARIOS WHEN SHELTER IS NEEDED
Three scenarios require basic knowledge of how to build a survival shelter:
1) Outdoor emergencies (peacetime)
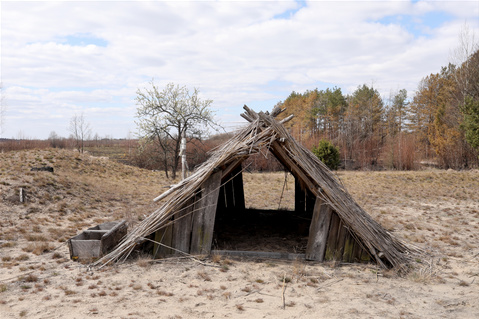
Anyone who navigates the twists and turns of a remote trail or ventures into rugged and remote wilderness should always have a SHTF survival plan. Flash floods and sudden storms happen; hikers get lost. Even the most seasoned outdoor enthusiasts encounter dangers and accidents on the most famous trails. Survival in a life-threatening situation depends on knowing how to find suitable shelter.
2) Rapidly evolving civil unrest, no easy escape routes
Civil unrest, such as riots, government instability, economic crises, and terrorist attacks, can escalate quickly, causing disruptions to essential services, leading to hardship, panic, and gridlock. Getting out of this is one solution to such a crisis, and this will require a camping shelter – either a temporary solution, a more secure and permanent location, or a fallout shelter.
3) Have all the SHTF moments: CBRN
CBRN (Chemical, Biological, Radiological or Nuclear) – is the most extreme emergency that requires immediate shelter.
Basic shelters in the wild are not sufficient for a CBRN event. CBRN incidents require permanent, fortified structures that can protect against these threats. This guide discusses different types of shelters suitable for CBRN incidents, including options for homemade and off-the-shelf solutions.
BASIC COMPONENTS OF SURVIVAL SHELTERS
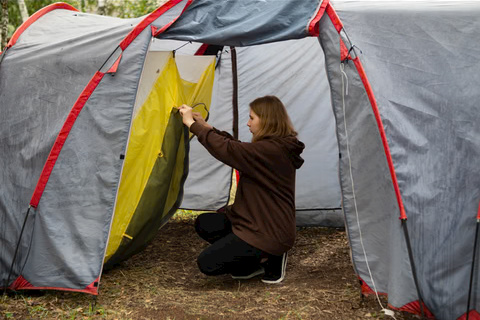
PROTECTION FROM THE ELEMENTS
- Weather Resistance (Rain, Snow, Sun): The main purpose of any shelter is to be dry and comfortable in climatic conditions. A well-constructed shelter should provide a protective shield from rain or snow and protect against the harsh accompanying hazards of extreme climates – hypothermia in cold weather and protection from the scorching sun.
- Wind protection: Wind can greatly increase heat loss, dangerously exhausting it, making even moderate temperatures feel much colder, and accelerating exposure to dangerous elements. A wind barrier will create a calmer and safer environment inside the shelter, allowing those seeking shelter to more effectively maintain their body heat.
- Ventilation (insulation to retain heat and ventilation to cool down): Optimal temperature regulation depends on the environment. Insulation with available materials – leaves, branches, and in cold climates, snow – can trap your body heat.
Note. Depending on the situation, consider camouflaging your shelter to blend in with your surroundings and avoid unwanted detection and attention.
LOCATION AND LOCATION – THE FUNDAMENTAL OF SURVIVAL

Choosing the right place to shelter is the first and perhaps most important step. Before you start chopping branches and practicing tying fancy knots with your paracord bracelet, review this basic checklist:
- When choosing where to camp, always look for elevation to avoid waterlogging and even flooding.
- Look for areas with natural windbreaks or existing structures that can provide additional protection from the elements. In cold climates, shelters should always be placed on south-facing slopes as they maximize precious sunlight for additional warmth.
If you find yourself in mountainous terrain, especially during the rainy season, be very careful of potential hazards such as falling rocks, dead trees, or areas prone to avalanches and landslides.
A well-chosen location can greatly increase the effectiveness and stability of your shelter!
Learn to read a map

We are so used to using our phones and modern satellite apps and tracking that provide excellent accuracy in determining the location of military class for our daily commutes. But in the wild, and when disaster strikes, technology is always the first casualty.
Having a purpose-built hiking GPS device should be part of your wilderness survival kit, but if its battery runs low, the next best thing is to go back to basics: maps, a compass, and some very basic but essential navigation skills.
Tip: Find a place with access to clean drinking water and sanitation. Ideally, your shelter should be built near easily found and accessible materials that can be used for construction or fire, such as fallen branches or dry leaves.
STEPS TO BUILD A BASIC SURVIVAL SHELTER

With a little knowledge and ingenuity, even a novice survivalist or outdoor enthusiast can create a safe shelter from easily available materials.
Here's a step-by-step guide inspired by the most popular wilderness survival books:
STEP 1: RATE SITUATION AND GATHER TOOLS
- Assess your needs: Consider factors such as weather conditions, length of stay, and available resources.
- Perform a tool check: A sharp stone or, better yet, a quality full-blade knife will help cut and shape other materials. A saw or axe is much better at chopping than a knife (if you only have one knife, limit its wear by using it carefully, and try to use other tools as well).
- Use extra materials: Try to have tools and equipment on hand, such as rope or even a poncho, so you can use them in a moment of need.
STEP 2: CREATE A FRAME
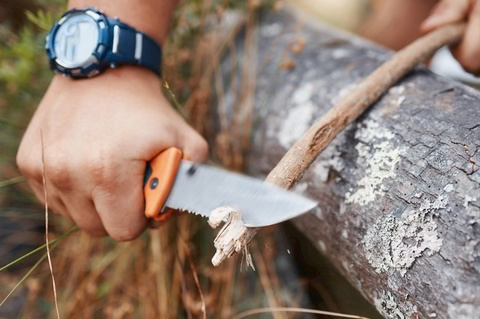
Choose strong, dead wood: Look for dry, fallen branches or dead (but not rotten) logs for better stability. When possible, save calories by gathering nearby dead wood, which is also usually lighter and easier to work with.
Choosing wood by location:
- Coniferous woods: Spruce, fir, and pine are good options due to their straight growth and relatively lightweight nature.
- Hardwoods: Oak, hickory, and birch have good strength but can be heavier.
- Tropical regions: If available, look for a strong hardwood like mahogany or teak. Warning: These are difficult to cut with simple tools.
Create a leaning structure: Find a large, sturdy tree trunk or rock as a main support. Using your survival staff, prop up several long branches at an angle to this support, leaning them toward the ground. The ideal angle for stability is between 45 and 50 degrees.
STEP 3: ATTACH THE FRAME
Tie the branches together: Use vines, strips of bark, or even, as a last resort, clothing items to securely tie the leaning branches to the supporting trunk or rock. Make sure the structure is stable and can withstand wind or light snowfall.
STEP 4: CREATE A ROOF
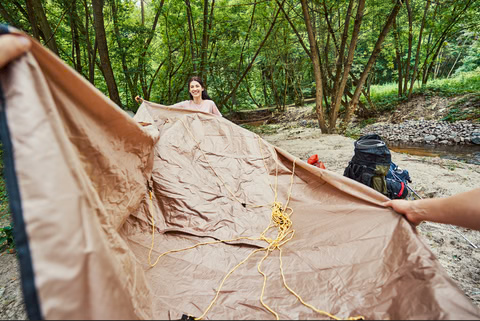
The roof is the most important component of a survival shelter. It not only repels water, snow, and wind, but also insulates your shelter, ensuring its ability to retain heat.
- Gather smaller branches and leaf litter. Gather smaller branches, leaves, pine needles, or any other readily available insulating material.
- Lay down a layer of roofing material: Carefully layer the collected materials on top of the leaning branches, starting from the bottom and working your way up. The thicker and denser the roof layer, the better the thermal insulation it will provide.
Note. Remember this important fact: hot air is lighter than cold air and will always rise. This principle should be an integral component of building a shelter so that heat radiates to you and is retained. Even a small fire will keep you warm and dry throughout the night.
STEP 5: INSULATE THE FLOOR AND ENTRANCE
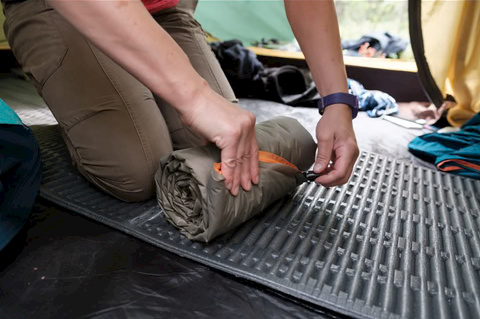
Energy conservation is of paramount importance, and a well-insulated shelter protects longer and more effectively. Heat not only wants to rise, but according to the laws of thermodynamics, it also wants to be absorbed by the cold ground you sleep on.
That's why it's important to have some buffer between you and the ground so that your body's energy isn't wasted on being quickly absorbed by the ground.
Here are the best ways to insulate your body from the cold (and heat):
- Clear and level the ground: Remove any rocks, sticks, or debris from under the canopy where you'll be sleeping.
- Create a layer of insulation: Using leaves, pine needles, grass, or any other soft material available, create a thick layer of insulation on the cleared ground to provide warmth and comfort.
Important: If you decide to build a campfire, create a a special fire pit at a safe distance from your shelter to minimize the risk of sparks igniting the structure.